Contents
When embarking on the journey of setting up custom metal garages, think of it as laying a sturdy foundation for your organizational aspirations.
The process may seem daunting at first, but with the right guidance and approach, you can transform a pile of metal parts into a functional and durable space that suits your needs perfectly.
Stay tuned to uncover essential tips that will streamline your garage setup experience and ensure a successful outcome for your project.
Key Takeaways
- Choose the appropriate location with optimal functionality in mind
- Organize parts and tools efficiently for easy access and maintenance
- Ensure precise frame assembly and secure bolt connections with high-quality materials
- Follow manufacturer’s guidelines strictly for installation and add finishing touches for a personalized and secure garage
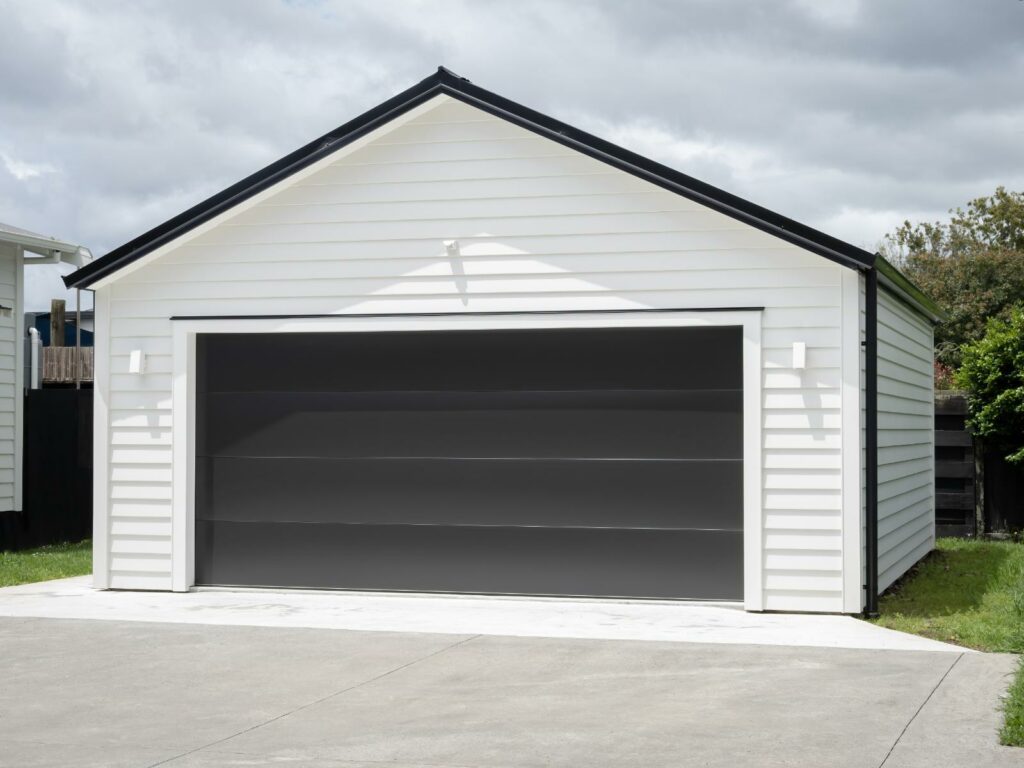
Choosing the Right Location
To ensure optimal functionality and longevity of your custom metal garage, selecting the appropriate location is paramount. When choosing a spot for your metal garage, consider landscaping considerations to ensure the ground is level and well-drained. A flat surface will provide a stable foundation for your structure and prevent any potential water damage. Additionally, clearing the area of any debris or obstacles will further enhance the safety and usability of your garage.
Safety precautions are also crucial when determining the location of your custom metal garage. Ensure there are no overhead power lines or trees that could pose a hazard. By selecting a safe location, you can protect both your property and yourself from potential accidents or damage.
Weather protection is another aspect to consider when choosing the right location for your metal garage. Select a spot that’s shielded from strong winds and direct sunlight to minimize wear and tear on your structure. This will help maintain the integrity of your garage and protect your belongings stored inside.
Preparing the Foundation
How can you ensure a solid and stable foundation for your custom metal garage?
Before beginning the construction of your metal garage, it’s crucial to inspect and level the foundation area. Start by clearing the site of any debris, vegetation, or rocks that could affect the integrity of the foundation. Use a level to ensure the ground is even and flat, making any necessary adjustments to guarantee a stable base for your garage.
Once the foundation area is properly prepared, the next step is to pour the concrete. Ensure that the concrete is of the right mix and quality for durability and strength. During the pouring process, pay close attention to the depth and thickness of the concrete to meet the requirements of your custom metal garage.
After pouring the concrete, the curing process is essential for the foundation’s strength. Keep the concrete moist and at the right temperature to allow it to cure properly. This process is critical for the long-term stability of your metal garage.
Unpacking the Garage Kit
Upon receiving your custom metal garage kit, carefully unpack the components to ensure all parts are accounted for and undamaged. This step is crucial to ensure a smooth assembly process and the structural integrity of your garage. Here are some key points to consider while unpacking your garage kit:
Unpacking Tips:
| Item | Description |
|---|---|
| Garage Layout | Lay out all components according to the garage layout plan provided. This will help you visualize the assembly process and ensure that all parts are present. |
| Weather Protection | Check for weatherproofing materials included in the kit. These components are essential for protecting your garage against the elements, ensuring its longevity and durability. |
Properly organizing the components based on the garage layout will save you time during assembly and reduce the chances of missing parts. Additionally, ensuring that the weather protection materials are intact will safeguard your garage from moisture and other weather-related damage, prolonging its lifespan. By following these unpacking tips, you set a solid foundation for a successful garage setup, providing you with a secure and weather-resistant space for your belongings.
Organizing the Parts and Tools
After ensuring all components are unpacked and accounted for from your custom metal garage kit, the next crucial step is organizing the parts and tools for efficient assembly. Proper tool organization is key to a smooth building process. Begin by sorting your tools into categories such as wrenches, screwdrivers, pliers, and hammers. Consider using a toolbox with compartments or a pegboard system to keep everything easily accessible.
When it comes to part storage, having a systematic approach can save you time and frustration. Sort the different parts of your metal garage kit by type and size. Use labeled bins or containers to keep nuts, bolts, screws, and other small pieces organized. Larger components like beams and panels should be stacked neatly in a designated area with clear labels to avoid confusion during assembly.
To streamline the process further, create a detailed inventory list of all parts and tools. Check off each item as you organize them to ensure nothing is missing. This checklist will also help you keep track of progress as you work through the assembly. By maintaining a well-organized workspace with all parts and tools readily available, you’ll greatly improve the efficiency and enjoyment of setting up your custom metal garage.
Assembling the Frame
To ensure the stability and durability of your custom metal garage, it’s crucial to pay close attention to frame alignment during assembly.
Make sure to secure bolt connections tightly using the recommended tools to prevent any structural issues.
Following these tips will help you set up a sturdy and reliable frame for your metal garage.
Frame Alignment Tips
To ensure proper alignment of the metal garage frame, begin by laying out all the components in a well-lit and spacious area. When welding the frame, employ proper welding techniques to ensure structural integrity. Selecting high-quality materials is crucial for rust prevention and ensuring frame durability over time.
Prioritize welding each joint accurately to maintain the frame’s structural stability. Double-check all measurements and angles to guarantee precise alignment during assembly. Utilize clamps or braces to hold the frame components in place before welding.
Avoid rushing through this step, as accurate alignment is key to the overall stability and longevity of your custom metal garage. By following these tips, you’ll create a sturdy and reliable metal garage frame.
Secure Bolt Connections
When ensuring the proper alignment of the metal garage frame, the next critical step is to secure bolt connections during the assembly process. To enhance wind resistance and prevent rust, it’s crucial to use high-quality, galvanized bolts and nuts.
Begin by loosely fitting the bolts and nuts before tightening them gradually to ensure even pressure distribution. Inspect for any gaps or misalignments in the frame, adjusting as needed to guarantee a snug fit.
Apply anti-corrosion coating on the bolts and nuts to prevent rust formation over time. Tighten all connections securely using appropriate tools to withstand external forces and ensure the structural integrity of your custom metal garage.
Installing the Roof and Walls
During the installation process of the roof and walls for your custom metal garage, ensure that all panels are securely fastened to the frame using the recommended hardware and techniques. This step is crucial to guarantee the structural integrity and weather resistance of your garage.
Here are some essential tips to guide you through the installation process:
Proper Alignment: Before securing the panels, make sure they’re correctly aligned with the frame to avoid any misalignments that could lead to leaks or structural issues later on.
Use Sealants: Apply appropriate sealants at joints and seams to prevent water infiltration and enhance the overall weatherproofing of your garage.
Follow Manufacturer’s Guidelines: Adhere strictly to the manufacturer’s instructions regarding panel installation, fastening techniques, and recommended hardware to ensure optimal performance and longevity of your metal garage.
Inspect Regularly: After installation, conduct regular inspections of the roof and walls to check for any loose panels, signs of wear, or areas that may need resealing. This proactive approach can help you address any potential issues before they escalate.
Securing Doors and Windows
Securing doors and windows involves meticulously aligning each opening with the frame and fastening them securely to ensure optimal functionality and security. When setting up custom metal garages, ensuring the security of your entryways and windows is crucial to safeguard your belongings and provide peace of mind. Let’s delve into some key tips for securing these essential parts of your garage:
Tips for Securing Doors and Windows:
| Securing Entryways | Window Protection | Additional Tips |
|---|---|---|
| Align door hinges properly to prevent forced entry | Install security bars or grilles to deter break-ins | Use shatterproof glass for windows |
| Use heavy-duty deadbolts for added security | Apply window film to reinforce glass strength | Install motion-sensor lights near windows and doors |
| Consider a smart lock system for remote monitoring | Keep vegetation trimmed around windows for visibility | Invest in a reliable alarm system for extra protection |
| Inspect and maintain door seals regularly | Utilize window locks to prevent unauthorized opening | Reinforce garage door tracks to prevent prying |
Adding Finishing Touches
To fortify the security measures of your custom metal garage, meticulous attention to detail is required when adding finishing touches. Enhancing your garage not only improves its functionality but also adds a touch of personalization. Here are four essential finishing touches to consider:
Custom Lighting: Install custom lighting fixtures strategically in your garage to ensure adequate illumination for various tasks. Consider LED lights for energy efficiency and bright, long-lasting lighting. Motion-activated lights can enhance security by illuminating the area when motion is detected.
Personalized Signage: Add personalized signage to your garage to make it uniquely yours. This could include your family name, house number, or a custom logo. Clear signage not only adds aesthetic value but also helps visitors easily identify your garage.
Wall Organization Systems: Utilize wall organization systems to maximize space and keep your garage clutter-free. Install hooks, shelves, and pegboards to store tools, equipment, and other items neatly. This not only improves functionality but also enhances the overall look of your garage.
Flooring Upgrades: Consider upgrading your garage floor with epoxy coatings or rubber tiles for a more polished look. These upgrades not only enhance the appearance of your garage but also provide durability and ease of maintenance.
Recap
Following these top tips for setting up custom metal garages will ensure a successful and efficient installation process.
By carefully choosing the right location, preparing the foundation, unpacking and organizing the garage kit, assembling the frame, installing the roof and walls, securing doors and windows, and adding finishing touches, you’ll have a functional and durable metal garage ready to meet your storage needs.
Remember to follow the manufacturer’s instructions for best results.
Recent Posts
Building Strong Steel Structures for Heavy Machinery
When constructing steel structures to support heavy machinery, precision is key. Each element, from the
Efficient Construction of Large Metal Warehouses
When it comes to the optimization of building substantial metal storage facilities, one must consider
Why Choose Energy-Efficient Metal Warehouse Construction?
When it comes to selecting the construction method for your warehouse, choosing energy-saving metal construction